Questo biglietto è il mio preferito tra quelli che ho realizzato quest'anno.
Non è molto diverso da quello che avete già visto in questo post, a dire il vero, ma ci sono dei piccoli particolari che fanno la differenza.
My favourite card among the ones I made this year? This one.
It is similar to the one you saw in this post, though the particulras make it a completely different thing.
Ho pensato ad un tutorial per realizzarne uno passo passo: giusto in tempo per le ultime consegne a mano prima di Natale.
I though it was a good idea to write a tutorial about it just before the last Christmas delivery.
1a. Per prima cosa stampate il timbro con le renne sul cartoncino bianco che avete scelto per il biglietto (il mio inchiostro preferito è sempre il Versafine nero).
A questo punto potete seguire due strade. Partiamo con la prima: la mascheratura con i post-it.
1a. First, print your reindeers stamp on the white cardstock you chosed (my favourite ink is always black Versafine).
At this point, you can follow two ways. The first one: the post-it masking.
2a. Stampate lo stesso soggetto sui post-it, cercando di usare la parte con al di sotto l'adesivo.
2a. Print the reindeers also on the post-it, do it on the part with the adhesive slide on the back.
3a. Ritagliate con cura tutti i personaggi, cercando di stare al di qua della linea di contorno nera.
(Avrei potuto evitare la fatica di scontornare anche Babbo Natale, ma l'ho capito dopo... Risparmiatevelo, almeno voi : ).
Attaccate le sagome sui soggetti stampati (nel caso aiutatevi con una colla riposizionabile).
3a. Cut each characher inside the inked shape (I realised too late I din't need to block out Santa... I strongly suggest you to avoid it : ).
Glue the shapes on the printed characters (use a replaceable glue if you face problems).
4a. Da un altro post-it ricavate un cerchio del diametro che preferite: sarà la vostra luna piena. Attaccatela sul Babbo Natale.
4a. Get another post-it and cut a circle as big as you like: it will be you full moon. Attach it over Santa.
5a. Per realizzare il cielo sfumato il metodo più veloce è quello di inchiostrare un rullo sul tampone Kaleidacolor, che ha già dei cuscinetti in tonalità sfumate.
5a. The fastest way to make a soften sky is to ink a brayer by a Kaleidacolor ink pad that already offers different soft tones.
In alternativa, potete usare il rullo (o le spugnette tipo il Blending Tool, se siete più comodi) con tre cuscinetti diversi: dall'azzurro al blu.
Otherwise, you can pass the brayer on three different ink pads (or make use of sponges like Blending Tool, if you like): from light to dark blue.
6a. Ottenuta la copertura desiderata, togliete i post-it, e avrete la stampa pronta per la coloritura (niente panico se il contorno dei personaggi non sarà preciso: basterà ritoccare qui e là con un po' di colore).
E qui entra in gioco il secondo metodo: la mascheratura con la polvere da rilievo.
6a. Once you've got the background, take the post-it off and you'll be ready to colour (if the outline is not perfeclty define do not panic, just use some colour to correct the parts).
Now, about the latter method: the embossing powder masking.
1b. Una volta stampato il timbro sul cartoncino, coloratelo come d'abitudine (nel mio caso con i pennarelli acquerellabili).
1b. Once you print the card, colour it as usual (I used watermark markers).
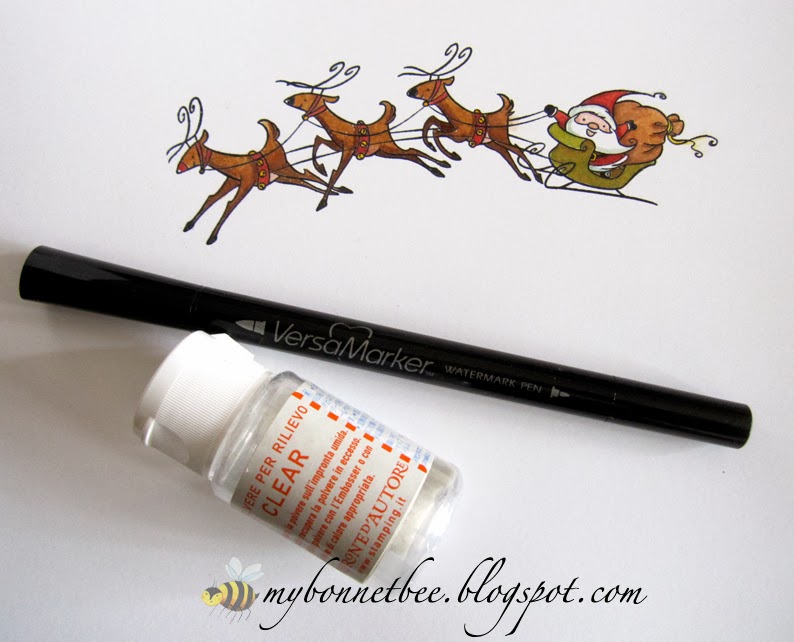
2b. A questo punto prendete il pennarello Versamark trasparente e passatelo su tutti i personaggi colorati.
2b. Now, take the Versamark transparent marker and pass it all over the coloured characters.
3b. Aggiungete la polvere da embossing trasparente e fondetela. La stampa sarà così protetta da ogni intervento ulteriore di coloritura.
3b. Add some transparent embossing powder and melt it. The print will be now protected.
4b. Procedete come al punto 4a per realizzare la mascheratura per la luna.
4b. To make the moon follow the instruction at point 4a.
5b. Idem come il 5a.
5b. See 5a.
6b. Rimuovete la mascheratura e avrete la vostra luna piena. Passate un fazzoletto morbido sui personaggi stampati, così da togliere l'inchiostro blu in eccesso. Se rimangono delle parti bianche attorno alla stampa, riprendete il colore con delle matite o dell'acquerello.
6b. Remove the mask and you'll see the full moon. To take eccessive blue ink away, pass a soft handkerchief over the characters. If you see white areas around the printed shapes, use some watermark pencils to fix the colouring.
Un piccolo trucco per evitare lo stacco netto con il cielo, è quello di usare una matita bianca morbida per sfumare il contorno della luna.
A trick: to avoid a gap between the shape and the background, use a white soft pencil to soften the moon outline.
Per completare il biglietto, ritagliare i due profili del paesaggio innevato, decoratene il bordo con del glitter trasparente e incollateli uno sull'altro con del biadesivo spessorato.
To complete the card you must cut out two outlines of a snowy background, glitter the borders and glue them one on the top of the other using some 3-D bihadesive.
Tocco finale la scritta con un paio di brillantini rossi.
Final touch: the sentiment enriched by red strasses.
Spero che il tutorial vi sia stato utile. Buon lavoro! ^_^
Hope this will be useful. Good work! ^_^
Timbri/Stamps: 1374-U babbo slitta, Snowy Short Stacks (Stampendous)


Nessun commento:
Posta un commento
grazie per aver lasciato un commento ^____^