Visualizzazione post con etichetta SimonSaysStamp!. Mostra tutti i post

domenica 14 giugno 2026

Fusa di compleanno / Purred Birthday

La mia nipotina da poco ha un gatto rosso da cui non si separa mai, quindi è stato facilissimo scegliere il soggetto della tag chiudi pacco per il suo regalo di compleanno. Questo micione prende tutta la scena, è bastato aggiungere uno sfondo con lo stencil coordinato al set e alcuni fiorellini a contrasto. Il papillon è stato tagliato e colorato a parte per dare un po' di tridimensionalità al tutto.
Since my nephew has recently got a cat she cannot separate from, I had no doubt about the character to stamp on her birthday present tag. This big cat takes all the scene! I just added a stenciled background and some flowers in contrast color. I cut and colored the bow tie apart to add more dimension to the scene.


Aggiornamento: grazie a questa tag ho vinto il voucher da 25$ nella Wednesday Challenge di Simon Says Stamp! 🥳
Updating: I'm a Simon Says Stamp Wednesday Challenge winner!! 🥳


Timbri e Stencil / Stamps and StencilSnarky Cat (Stampers Anonymous),  Miyono (Impronte d'Autore)

mercoledì 10 giugno 2026

Adventure Time

Fare dei regali di compleanno a mio marito è semplicissimo: bastano dei libri! In questo siamo molto simili. E ad accompagnarli spesso scelgo una tag che poi diventa un segnalibro. Quella che ho realizzato quest'anno mi piace particolarmente, perché l'intaglio del mappamondo lascia intravedere la pagina sottostante e l'effetto ruggine dello sfondo picchiettato di azzurro e verde mi affascina ogni volta.
It's so easy to make birthday presents to my hubby: a bunch of books makes him happy! We are so similar.
I often chose to make a tag as a birthday card, so that he can use it as a bookmark. I like very much this year version, because the perforated globe lets see the page underneath. And also the rust effect fascinates me every time.


Updating: I was spotted on Simon Says Stamp Monday Challenge!


Fustelle / Dies: Handwritten Journey (Sizzix), Tailored (Sizzix), Vault World Travel (Sizzix), Tag 1 (Il Negozio della Mamma di Cle), Craftoween 2025 Advent Calendar (Spellbinders)
Embossing Folders: Typewriter

martedì 23 dicembre 2025

Tag vintage invernale / Winter vintage tag

Ora che ho consegnato il pacchetto alla destinataria, posso mostrarvi questa tag un po' mixed media che ho preparato per Natale proprio pensando a lei e ai suoi gusti. Quest'anno ho preparato pochissime card, complice anche il fatto che alcuni destinatari che abitualmente sono all'estero passeranno le feste in Italia, e quindi mi sono limitata a delle tag chiudipacco. Per questa ho utilizzato dei prodotti di aziende diverse, alcuni datati ed altri più recenti, ma che mi sembra stiano bene insieme. Li trovate tutti linkati in calce al post.
Now that the Christmas parcel to my friend has been delivered, I can show you this mixed-media tag I made thinking of her. This season I made very few cards, because some of the recipients who live abroad this year will spend Christmas time in Italy and I made some tags for them. For this one I used products by different brands, some new and some old: you can find them at the end of the post.


I was spotted on SSS Monday Challenge!


Fustelle / Dies: Winter Wonderland (Sizzix), Woodlands (Sizzix), Wishes Strips (Tommyart), Le tag, Snowflake (Impronte d'Autore)
Stencil: THS098 Merry Christmas (Stampers Anonymous)

giovedì 10 aprile 2025

Coloring Club Challenge - Rainbow

Eccoci al quarto tema della sfida Coloring Club Challenge: l'arcobaleno. In questa card l'ho abbinato ad un annaffiatoio e un vaso con una casetta, pronta a ricevere l'allegra pioggia multicolore primaverile!
Behold the forth Coloring Club Challenge theme: rainbow. I matched it with a watering can and a vase with plants and a little house, ready to receive the colored Spring rain!

Ho utilizzato timbri di diverse aziende, mentre per la colorazione ho optato per i pennarelli ad alcool OLO.
I used stamps from different brands and OLO alcool markers for the coloring.

Se siete interessati a partecipare, trovate sul profilo di Alberto il post con tutti i dettagli.
If you like to participate, you can find the challenge details on Alberto's post.

Timbri / Stamps: Cats in the garden (Tommy Art), Hello Spring (Florilege Design), Magical Birthday (Simon Says Stamp)
Colorazione / Coloring: OLO markers, penna gel bianca

lunedì 30 gennaio 2023

Simon Says Stamp - Designer Spotlight Week 5 - "Food And/Or Drink"

Non posso credere che il mese di gennaio sia già finito! Sono tristissima all'idea che questo sia il mio ultimo post come ospite del Simon Says Stamp Monday Challenge... Sono state 5 settimane davvero esaltanti!

I can not believe this is the last week of January! I'm so sad that this is my last post on Simon Says Stamp Monday Challenge blog into the Designer Spotlight... There were 5 weeks so exciting!


Il tema della sfida di questa settimana è "Cibo e/o Bevande".
The challenge theme of this week is "Food and/or Drink".

Per il mio progetto ho scelto di usare due set di Lawn Fawn perfetti per l'occasione, anche in vista di S. Valentino, festa ormai alle porte. Come per le card precedenti, trovate i passaggi qui di seguito e la lista dei materiali in calce al post.

I chose two stamp sets by Lawn Fawn that could also fit well with the incoming Valentine's day. Like the previous projects, you can find a photo tutorial here below while all the products are at the end of the post, linked to the Simon's store.

Stampate sul cartoncino bianco i soggetti che preferite dai set di timbri "Backed with love" e "Sprinkled with joy", usando il tampone adeguato al medium che userete per colorarli: nel mio caso il Versafine Onyx Black su alcuni ritagli di cartoncino acquerellabile. Per realizzare i biscotti a cuore con l'interno glassato vi basterà stampare il cuore piccolo del secondo set all'interno di quello più grande. Per rendere più realistici gli elementi di legno create delle venature con il colore marrone chiaro, mentre per i biscotti aggiungete alcuni puntini con due tonalità di marrone e la penna gel bianca. Se utilizzate i colori acquerellabili, vi suggerisco di colorare l'interno dei biscotti con le matite o i pennarelli ad alcool, per evitare che il rosso sbavi con l'aggiunta del glossy.

Stamp onto the white paper the subjects you like more from the stamp sets "Backed with love" and "Sprinkled with joy" by using the proper ink pad according to the medium you will use to color them: I used Versafine Onyx Black onto watercolor paper. To make the biscuits with the glazed center, you have to stamp the smallest heart into the biggest one from the second stamp set. To make the wooden elements more realistic you can add some veins with the light brown color, and for the biscuits you can add some dots with two tones of brown and the white gel pen. If you use watercolors medium I suggest to color the center of the biscuits with pencils or alcool markers to avoid any smudge with the glossy layer.

Colorate tutti gli elementi e tagliateli con le fustelle coordinate o le forbicine (per tagliare i biscotti a cuore se non avete la fustella coordinata potete usare quella del set "Stinkin' cute").  Applicate il glossy Morning Dew Crystal Drops (oppure il Glossy Accents) su tutti i cuoricini a simulare la marmellata rossa e lasciatelo asciugare bene. Se, come me, avete più elementi dello spazio disponibile sulla card, potete ampliarlo creando una mensola con una striscia di cartoncino bianco colorato allo stesso modo degli elementi in legno.

Color all the elements and cut them by using the coordinate dies or the small scissors: if you don't have the coordinate die, you can use the heart die from "Stinkin' cute" set for the biscuits. Add the Morning Dew Crystal Drops (or the Glossy Accents) in the center for the red jam effect, and let it dray very well. In case you made more elements than the space on the panel can host, you can increase it by making a wooden shelf from a strip of white paper and color it in the same way of the rolling pin.

Per comporre la card, tagliate un cartoncino bianco di 15 x 12 cm e date movimento allo sfondo sfumandone la metà superiore con il Distress Oxide Squeezed Lemonade (usate il margine di un foglio per mascherare la parte sottostante).

To make the background, cut a 5.5" x 4.75" white panel and blend the upper half with Distress Oxide Squeezed Lemonade (use a sheet edge to mask the lower part).

Aggiungete sullo sfondo qualche cuoricino pieno del set "Backed with love" con lo stesso tampone, quindi disponete gli elementi come preferite: prima di attaccarli con il biadesivo spessorato, valutate se volete completare la card con un sentiment sullo sfondo. Io ho scelto di stamparlo su cartoncino nero ed embossarlo in bianco a simulare la ghiaccia. Per armonizzare meglio il tutto, stondate gli angoli del pannello.

Add some yellow hearts on the background with the same ink pad, then put the elements as you like onto the panel: before attach them with foam adhesive, think if you prefer to add a sentiment on the background. I chose to stamp mine on a black strip and to emboss it in white as icing effect. To harmonize all the elements, cut out the corners of the panel.

Dopo aver attaccato tutti gli elementi, però, mi sembrava mancasse ancora qualcosa, quindi ho deciso di creare una ghirlanda di cuori da attaccare alla mensola: per replicarla vi basta fustellare nel cartoncino bianco 5 cuoricini con la fustella "Stinkin' cute" (oppure la stessa dei biscotti), sfumarli di rosa con il Distress Oxide Kitsch Flamingo e di rosso con il Candied Apple ed incollarli su un filo di cotone rosa, le cui estremità andranno attaccate agli angoli inferiori della mensola. Una volta soddisfatti, potete aggiungere qualche abbellimento, come delle paillette iridescenti.

Once I attached all the elements, I had the feeling that something was missing, so I decided to add a garland to fill the space under the shelf: to make it you have to cut 5 hearts with the die of the "Stinkin' cute" set (ore the same heart of the biscuits, it you have it), blend them with Distress Oxide pad Kitsch Flamingo and Candied Apple and glue them onto a pink cotton thread. At this point you can add some embellishments, like the iridescent sequins.

Da ultimo, attaccate il pannello su un biglietto a due ante rosso usando delle strisce di biadesivo spessorato e regalatelo ad una persona cui volete bene! ^_^

At last, attach the panel onto a red card base with the foam adhesive strips and give it to someone you love! ^_^

Spero che queste settimane insieme sul blog di Simon Says Stamp vi siano state d'ispirazione. Per me è stata senza dubbio una piacevolissima esperienza! Continuate a seguire il blog per i progetti strepitosi che vengono proposti ogni settimana e partecipate alla sfida per vincere un buono da $25 da spendere nel negozio di Simon Says Stamp!

I hope these weeks together on Simon's blog were inspirational for you. I really enjoyed this amazing experience! Go on following the blog for the wonderful projects shared every week and join the challenge to win a $25 gift voucher to Simon Says Stamp store!

Potete trovare tutti i prodotti che ho utilizzato nel negozio di Simon Says Stamp. Vi metto qui sotto la lista completa dei materiali.
You can find all the products I used in the Simon Says Stamp store. They are listed below.


Prodotti usati / Products used

Zig Clean Color Real Brush Marker: SandFog Gray, Warm Gray 2Light Blue, Cobalt Blue


lunedì 23 gennaio 2023

Simon Says Stamp - Designer Spotlight Week 4 - "Beautiful Blooms"

Nuova settimana, nuova sfida sul blog Simon Says Stamp Monday Challenge!

New week, new challenge on Simon Says Stamp Monday Challenge blog!

Il tema di questa settimana è "Beautiful Blooms".
The theme of this week challenge is "Beautiful Blooms".

I fiori sono i soggetti che prediligo per le card, soprattutto per portare una ventata di colore nei mesi invernali. Per il progetto di questa settimana ho scelto il bellissimo stencil "Peony Bouquet", con cui ho realizzato questa card effetto acquerello dai colori brillanti. Vi metto di seguito le foto della realizzazione passo passo, nel caso in cui voleste replicarla. In fondo al post invece trovate i link ai materiali che ho utilizzato.
Flowers are my favorite cards subjects, they are the best way to spread some color in the gloomy winter months. For the project of this week, I chose the beautiful stencil "Peony Bouquet" to make a watercolored card with the brightest colors. Here below there are some pictures of the making of and I linked the products I used at the end of the post.

Fissate con del washi tape lo stencil sul cartoncino acquerellabile, quindi cominciate a sfumare il Distress Ink Scattered Straw al centro delle peonie.
Fix the stencil with washi tape on the watercolor paper, then blend the Distress Ink Scattered Straw in the center of the peonies.

Passate a sfumare il secondo colore, il Picked Raspberry.
Go on blending the second color, the Picked Raspberry.

Completate con il Seedless Preserves per i petali esterni e il Mowed Lawn per le foglie.
Complete the blending steps with Seedless Preserves for the external petals and Mowed Lawn for the leaves.

Per conferire maggiore vivacità ai fiori, bagnate un pennello e sciogliete il colore sfumato; se necessario intensificate ciascun colore, in modo da aumentare la tridimensionalità dei vari elementi.
To make the flowers more vivid, use a wet brush to activate the blended color on each section and add some color if you like to add more dimension.
 
In questa immagine potete vedere la differenza tra la peonia in cui il colore è stato intensificato e quelli solo sfumati con il blending tool.
In this picture you can see the difference between the watercolored peonies and the blended ones.

Procedete sezione per sezione fino a colorare gli elementi di tutto il pannello. 
Go on activating the color of each section of the panel.

Aggiungete alcuni dettagli con la matita Prismacolor Magenta PC 930, come le ombre e le nervature dei petali. Nell'area rimasta vuota stampate il sentiment che preferite e da ultimo completate il pannello con delle paillette iridescenti e incollatelo su una base a due ante mediante il biadesivo spessorato.
Sono molto contenta del risultato di questa card, che mi rimanda subito alla primavera. Spero piaccia anche a voi!
Add details to the petals, like shadows and veins with Prismacolor Pencil Magenta PC 930Stamp the sentiment in the empty area and complete the panel with some iridescent sequins, then attach it onto a white base card by using some foam adhesive strips.
I'm very happy about this card, it makes me thinking to Spring! I hope you like it too.

Partecipate alla challenge per vincere un buono da $25 da spendere nel negozio di Simon Says Stamp!
Join the challenge and win a $25 gift voucher to Simon Says Stamp store!

Potete trovare tutti i prodotti che ho utilizzato nello store di Simon Says Stamp. Vi metto qui sotto la lista completa dei materiali.
You can find all the products I used in the Simon Says Stamp store. They are listed below.


Prodotti usati / Products used

Tim Holtz Distress Mini Ink Pad Scattered Straw, Picked Raspberry, Seedless Preserves, Mowed Lawn


lunedì 16 gennaio 2023

Simon Says Stamp - Designer Spotlight Week 3 - "4 Legged Animals"

Ed eccoci al terzo post di gennaio per il Simon Says Stamp Monday Challenge!


Here we are with the third January post on Simon Says Stamp Monday Challenge blog!

Il tema di questa settimana è "Animali a 4 zampe".
The theme of this week challenge is "4 Legged Animals".

Con questo progetto ho rispolverato la tecnica del paper piecing, che consiste nel ritagliare e sovrapporre le diverse parti del personaggio in modo da creare un effetto tridimensionale. È una tecnica che richiede un po' di tempo e pazienza, ma l'effetto è davvero d'impatto. Mi sembrava il modo migliore di dare risalto al protagonista della tag di oggi, anche come omaggio alla mascotte del brand che gentilmente mi ospita sul blog del Simon Monday Challenge. 😊
Come per i post precedenti, qui di seguito trovate alcuni passaggi della realizzazione, mentre in fondo al post ho elencato i materiali che ho utilizzato con i link al negozio di Simon.
This project made me refresh the 3D paper piecing technique: it requires patience and time, but the final result is really appealing. Moreover, I believed it could emphazize the main subject of the tag best, and it could be the right tribute to the mascotte of the brand that kindly guest me on Simon Monday Challenge blog. 😊
As for the previous posts, please find below some steps of the making of as well as the list of products I made use of during the process, and the useful links to Simon's store.

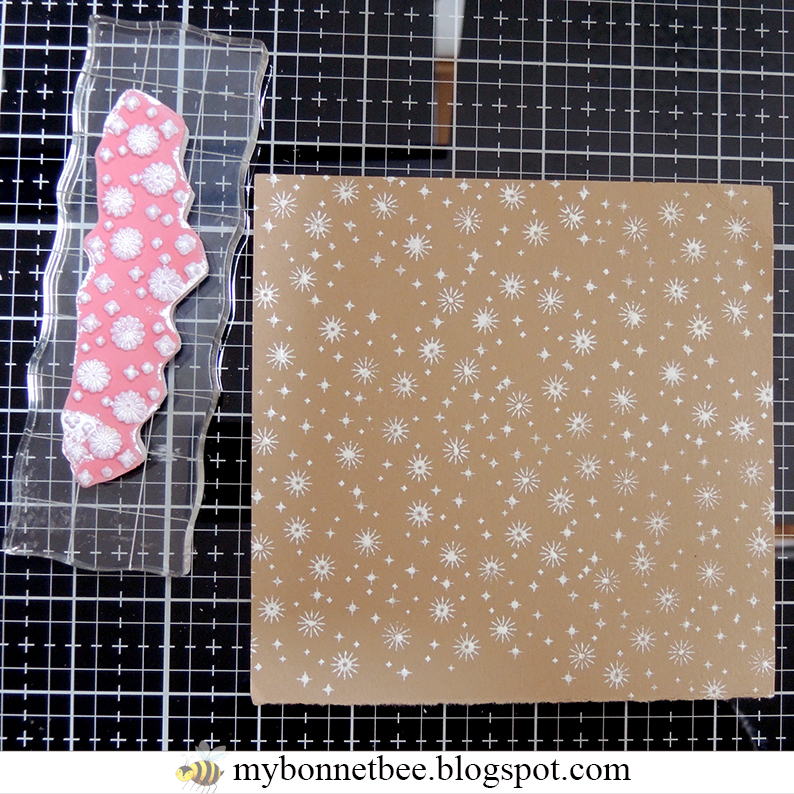
Il primo step è quello di preparare lo sfondo della tag stampando il timbro con i fiocchi di neve del set "Christmas Magic" sul cartoncino craft utilizzando il tampone Distress Ink Picket Fence.
The first step is to set up the background by stamping the snowflakes of the stamp set "Christmas Magic" onto the craft paper by using the Distress Ink Picket Fence pad.

Tagliate dal cartoncino bianco il profilo di una collina innevata a mano libera o utilizzando una fustella. Incollatela allo sfondo con i fiocchi di neve e fustellate il tutto con la fustella tag più grande del set "Framed Tags". Quindi incollate la tag su un cartoncino bianco e rifilate un bordino da 2 mm.
Cut a hill profile from the white paper by hand or using a die. Glue it on the background and cut it with the biggest tag die of the set "Framed Tags". Then glue the tag onto a white paper piece and trim out the edges leaving a small white border.

Utilizzando la fustella "Festive Words" tagliate le parole "winter" (eliminando con le forbicine la parola "hello") e "joy" da un cartoncino azzurro e sfumatene i bordi con il Distress Ink Vintage Photo. Quindi tagliate la base bianca e componete il sentiment pronto per essere incollato sullo sfondo usando il biadesivo spessorato.
Cut the words "winter" and "joy" from a light blue paper by using the "Festive Words" die (I cut out the word "hello"), and blend the edges with Distress Ink Vintage Photo. Then cut the outline from the white paper and layer the sentiment ready to be attached onto the base panel.

Per la tecnica del paper piecing, stampate 5 volte su cartoncino bianco il cane che preferite dal set "Crazy Dogs" utilizzando il tampone adeguato al medium che userete per colorarlo. Nel mio caso ho stampato su cartoncino acquerellabile con il Versafine Onyx Black e ho colorato con i pennarelli acquerellabili Zig Clean Color Real Brush. Tagliate le singole parti che andranno sovrapposte: per creare maggiore interesse, potete disegnare un maglioncino da far indossare al vostro amico a quattro zampe, magari coordinando la colorazione con la scritta Winter Joy.
Stamp the dog you like from the set "Crazy Dogs" 5 times by using a proper ink pad for the medium you choose to color the elements. I used Versafine Onyx Black onto a watercolor paper and Zig Clean Color Real Brush watercolor markers. Cut all the elements like in the picture (easy peasy with the Mini Snip Scissors!): to put more interest on the character, you can draw a jumper on your buddy coordinate to the color of the sentiment "Winter Joy".

Arrotondate ogni elemento sul lato posteriore usando lo Shaping Kit o un bulino a testa larga su una base morbida. Una volta pronti tutti gli elementi, potete attaccare i diversi strati usando il biadesivo spessorato nella parte più bombata, seguendo la numerazione indicata nella foto precedente (non preoccupatevi per la zona del collo: se usate il biadesivo solo nel centro, avrete tutto lo spazio per inserire la sciarpa).
Round every cut element on the back side by using the Shaping Kit or a big stylus on a molding pad. At this point, you can layer them following the numbers in the previous picture by using little pieces of foam adhesive in the center of each element (don't worry about the neck: if you put the adhesive just in the center, there will be enough space to insert the scarf).

Per arricchire l'outfit del personaggio, fustellate cappellino e sciarpa dal set "Winter Critters" nel colore che preferite (nel mio caso due tonalità di verde).
To enrich the outfit of your dog, cut a beanie and a scarf by using the "Winter Critters" die set from colored paper (I chose two tones of green).

Sfumate i bordi con il Distress Ink Walnut Stain, quindi vestite il vostro personaggio.
Blend the edges with Distress Ink Walnut Stain, then dress your character.

Da ultimo componete la tag attaccando i diversi elementi e aggiungendo alcune paillette iridescenti per conferire qualche colpo di luce.
Spero il progetto vi sia piaciuto, io mi sono divertita un sacco a realizzarlo!
At last layer the elements to compose the tag and add 4-5 iridescent sequins to give it some light.
I hope you like my project, I had so much fun making it!

LinkWithin

Related Posts Plugin for WordPress, Blogger...