venerdì 30 agosto 2024

Segnalibri per bibliotecarie gentili / Bookmarks for kind librarians

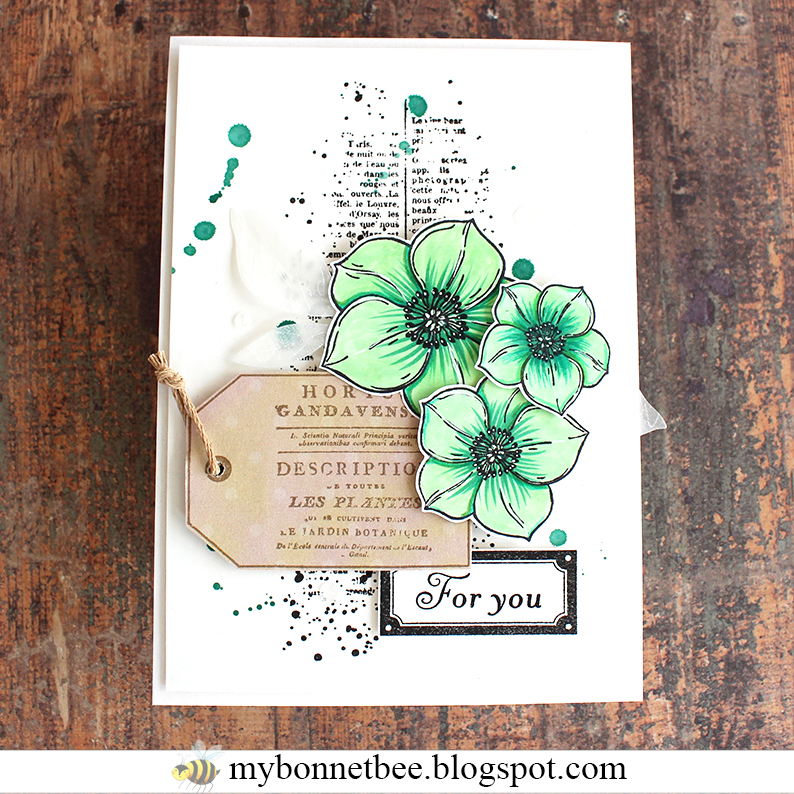
In vacanza ho più tempo da dedicare alla lettura, soprattutto romanzi e graphic novel, che adoro. Molto spesso, se non conosco l'autore, il prestito in biblioteca è un sistema che adotto per selezionare le opere da acquistare. Nel mese di agosto ho dato il tormento alle bibliotecarie di Bormio perché mi procurassero i volumi che desideravo leggere, così ho pensato di ringraziare ciascuna di loro con un segnalibro fatto a mano. Ho deciso di personalizzarli colorando i fiori in modo diverso, così che possano scegliere quello che preferiscono. Le etichette che restano a penzolare all'esterno del libro sono abbinate al colore dei fiori. Naturalmente ne ho fatto anche uno per me, aggiungendo un paio di "macchie" timbrate (che mi parevano un po' troppo "mixed media" per loro :)

During the Summer holidays, I love investing my time reading novels and graphic novels. I go to the library and pick lots of books, especially the ones with unknown authors; I want to see the books before going to buy them. This August I overloaded Bormio librarians with my requests, and I though that a nice bookmark could be the right way to thank each one of them. I decided to color the flowers in different way to give more choice to the recipients. The little tags match the colors of the flowers. I also made one bookmark for me adding a couple of stamped stains (maybe too much "mixed media" for them :)

Timbri / Stamps: Peach blossom branch (Tommy Art), Just My Type (Taylored expressions), Full Circle Stamps (Vicki Boutin)
Fustelle / Dies: Libro (La Coppia Creativa)
Carte / Papers: cartoncino bristol, carta craft
Colorazione / Coloring: Prismacolor Premier, Penna gel bianca

lunedì 26 agosto 2024

Tris di ellebori / Hellebore tris

Ora che anche l'ultima di queste card ha raggiunto la destinataria, posso condividerle qui sul blog.
L'ispirazione mi è stata data dai meravigliosi lavori del DT di Florilege Design: se non conoscete questo brand, vi consiglio di seguire il loro profilo IG o il loro blog.
Qui di seguito vi mostro ogni card nel dettaglio. Colorare questi fiori di elleboro è stato un vero piacere!
Since each card has reached its destination, I can share everything with you.
I was inspired by the wonderful projects of the Florilege Design DT: if you don't know this brand, I strongly suggest you to visit the IG profile or the blog page.
Below I show you the details of each card. Coloring these hellebore flowers was a real pleasure!


Carte / Papers: Transotype, Color & Dots2 n.7, vellum
Colorazione / Coloring: Copic, Illustrator, Distress Ink Tattered Rose and Lucky Clover, Penna gel bianca

giovedì 22 agosto 2024

Mini album Sweet Happy Memories

Sono onesta, quando ho visto la fustella Chocolate box di Tommy Art non mi è venuta in mente una scatolina, ma un mini album. E il bello è che per realizzarlo serve pochissimo materiale.
I have to be honest with you: when I saw the Chocolate Box die set by Tommy Art, the first image that popped into my mind was a mini album, not a box. And the best part is that the project required very few things.

Come base ho utilizzato il cartoncino kraft su cui ho incollato la copertina di carta colorata sia all'esterno che all'interno, per rendere più resistente la struttura.
I used a kraft card stock as a base, then I glued the patterned paper on both side of the cover to have a stronger structure.

Per la rilegatura interna ho usato una spina semplice e il bellissimo set di carte Vintage Flower, da cui ho ricavato sia le pagine che gli ephemera.
I used a simple spine and I cut all the pages; and the ephemera from the beautiful Vintage Flower pad.

Queste alcune pagine interne.
Here you can see the inner pages.

Trovo che sia un pensierino perfetto per una persona cui si vuole bene.
I think this is a perfect gift for someone we love. Small and full of details and sentiments.


Timbri / Stamps: Foto 2
Carte / Papers: Cartoncino kraft, Paper Pack Vintage Flowers

venerdì 16 agosto 2024

Halloween Party!


La carrellata di progetti dedicati ad Halloween procede con questa card-invito per una festa a tema, in cui mi sono divertita a mescolare i nuovi timbri di Tim Holtz con una fustella di qualche anno fa, semplice ma deliziosa! Qui di seguito vi mostro come l'ho realizata passo passo.

The Halloween series continues with this card - a party invitation. I had so much fun mixing the new Tim Holtz stamps with a die from some years ago, simple but so cute! I took some shoots of the making of to your benefit.

Sono partita da un cartoncino bianco di 15,5 x 10 cm, da cui ho fustellato le sagome del fantasma e del teschio.

I started from a 15,5 x 10 cm white rectangle card stock, and I cut the silhouettes of the ghost and the skull.

Il secondo step è stato quello di macchiare il foglio con il Distress Pumice stone, con cui ho anche stampato il grosso timbro centrale. A differenza dei numeri, che ho stampato in nero.

I fuzzy colored  the center of the card stock with the Pumice Stone and I used the same ink pad to stamp the main design. I chose black ink for the numbers.

Per creare maggiore interesse ho spruzzato un po' di Distress Spritz Fossilized Amber (anche su un cartoncino nero di 15,8 x 10,3 cm, la base della card).

To add more interest, I sprayed some Distress Spritz Fossilized Amber (also on a 15,8 x 10,3 cm black card stock, the base of the card).

Qui in vacanza in montagna ho più tempo per rilassarmi con attività che richiedono più tempo, quindi ho deciso di ricamare una ragnatela grigia seguendo le linee del timbro centrale. Il bordino nero mi è venuto spontaneo, abbinato ai numeri in basso.

On my summer holidays, time to relax and play with more demanding activities is no more a luxury, hence I could embroider the spider-web following the lines of the stamp. The black border was the natural finishing to match the numbers.

Per completare la card ho aggiunto la scritta con il nuovo bellissimo alfabeto gotico e un pizzico di eleganza al fantasma (con il papillon ricavato dal gambo della zucca della stessa serie di fustelle) e al teschio (con la tuba dello stesso set dell'alfabeto). Infine qualche paillette dorata ha completato il tutto.

To finish the card, I added the script made with the new beautiful gothic alphabet, and I added an elegant touch to the ghost (with a bow tie I made using the stalk of the pumpkin of the same die set) and to the skull (with a top hat from the same die set of the alphabet). Just a few gold sequins as a last touch.

Questa è l'idea da cui sono partita per realizzare questa card. Ho conservato lo schizzo perché mi fa ridere un sacco! :)
This is the sketch I made the first time this card popped into my bonnet. I kept it, because it makes me smile :)
 
Timbri / Stamps: Deconstructed CMS489 (Stampers Anonymous)
Fustelle / Dies: Halloween Hangouts 663088 (Sizzix), Vault Coffin Box 666680 (Sizzix)
Colorazione / Coloring: Distress ink Pumice Stone, Distress Spritz Fossilized Amber, White and violet gel pen


martedì 13 agosto 2024

Una notte spaventosa / A scary night

È ufficiale: con questo post inauguro i progetti per Halloween 2024! E per farlo parto con una card in cui ho utilizzato uno dei prodotti del bellissimo Calendario dello Spavento de Il Negozio della Mamma di Cle.
All'interno trovate 17 buste, ciascuna contenente un prodotto (timbro o fustella o stencil) realizzato per celebrare Halloween, ma non solo! Questo ramo ne è un esempio: è assolutamente versatile e lo si può declinare in altri colori e abbinarlo a foglie e fiori per adattarlo alla stagione.
E voi avete già pre ordinato il Calendario dello Spavento?
It's official: it's Halloween time! My first project is a card I made with one of the products of the amazing Halloween Advent Calendar by Il Negozio della Mamma di Cle.
Inside the box you can find 17 envelopes with a Halloween themed stamp or die or stencil, but not just for Halloween! The branch you see in this card is suitable for other seasons by changing the color and adding flowers or leaves.
Have you pre-order the Spooky Calendar yet?

Timbri / Stamps: Fantasmini birbanti
Colorazione / Coloring: Distress Oxide Shabby Shutters, Sqeezed Lemonade, Mowed Lawn, Pine Needles, Black Soot; Acrilico bianco

mercoledì 7 agosto 2024

Card psichedelica / Psychedelic card

Sistemando le bozze qui sul blog, mi sono resa conto di non aver condiviso con voi questa card, che risale alla release del bundle "Happy fall" di Tommy art. Per realizzarla ho usato la fustella del fungo del set Gnomes e comporla mi ha molto divertita, perché mi ha permesso di giocare ad incastrare i colori in modo casuale, senza pensarci su troppo (cosa che mi capita di rado). Ho scelto di non aggiungere glitter o paillette perché fosse adattabile anche per un pubblico maschile, che di solito non apprezza tanto gli abbellimenti :)

L'operazione di composizione è stata facilitata dal fatto che i cartoncini che ho utlizzato fossero adesivi, così anche le linee più sottili si sono incollate perfettamente alla base senza sbavature. Oltretutto questi cartoncini sono in offerta al 50% di sconto, quindi vale la pena approfittarne!

While arranging the drafts on my blog, I came across this card that I haven't talked about yet. I made it with the mushroom die from Tommy art Gnomes set, and I had fun mixing and matching the colored card stock in a casual way, without putting any thought in it (not my style). I chose to avoid glitters or sequins to make the card suitable to men too (they usually don't like embellishments :)

The composition phase was made easy by the adhesive card stocks, so even the thin parts adhered to the base without glue smudging. They are in a new 15 pack and 50% sale! Do not let them go!

Fustelle / Dies: Gnomes, Round card
Carte / Papers: Kit carte adesive con textureCartoncino bianco trama, Cartoncino nero


venerdì 2 agosto 2024

Orecchini fioriti / Flowery earrings

So che durante la diretta di presentazione dei nuovi prodotti, questi orecchini vi sono piaciuti un sacco! (Trovate la diretta FB del 19 giugno sulla pagina di Tommy Design).
Per realizzarli ho utilizzato due set di fustelle dell'ultima release di Tommy Art. Il procedimento è semplice, ma d'effetto, grazie al polyshrink, un materiale plastico termo-retraibile, perfetto per realizzare ciondoli e monili. Qui ho usato il colore opalino.

I know you liked these flowery earrings a lot during the FB live on Tommy Design page! I used two dies from the last Tommy Art release.
The making of is simple and pretty, thanks to the polyshrink, the plastic sheet that shrinks, perfect for charms and bijoux. I used the opaque type.

Per realizzare questi orecchini ho tagliato la corolla più grande del fiore dell'elleboro e ho sfumato un lato con un tampone chalk rosa chiaro prima della restrizione. Quindi ho praticato il foro centrale e ho modellato il fiore quando il pezzo era ancora caldo (non a mani nude, ma con un paio di guanti da cucina!).
Le foglie fanno parte del set della rosa: anche queste sono state sfumate con un tampone chalk verde chiaro, forate e poi modellate a caldo.

For each earring, I die cut the bigger corolla from the Spring flower 3 set, and one leaf from the Rose set; then, I inked one side with the chalk pad rose and green. After that, I made the hole for the pin and shrank the pieces, modeling them when they were hot (by using a pair of dish gloves). In the last step I composed the earring pair with the wire elements and a couple of iridescent beads.

Fustelle / Dies: Spring flowers 3, Rose
Colorazione / Coloring: Chalk pad pink and green

LinkWithin

Related Posts Plugin for WordPress, Blogger...