In vista della festa della mamma, oggi vi propongo una easel card. Si tratta di un progetto molto semplice, che richiede poco materiale e con l'effetto sorpresa garantito. Sul web ne trovate moltissime varianti.
Waiting for the Mom's day, today I suggest you an easel card. Despite this is a simple project, requiring only a few materials, the surprise effect is guaranteed. You can find many similar projects on the web.
Il bello delle easel card è il fatto che possono essere inserite piatte in una busta, ma una volta estratte possono essere sviluppate tridimensionalmente e diventare un home decor.
Easel cards can flat into the envelopes, and that's practical; and when you pull them out, they became a beautiful 3D home decor.
Il risultato mi piace tantissimo, perché è luminoso, colorato e pieno di allegria.
I like very much the result, it is sunny and joyful!
In fondo al post trovare l'elenco dei materiali che ho utilizzato, mentre qui di seguito vi lascio il tutorial fotografico passo passo.
At the end of the post you can find the supplies list, and the step by step photographic tutorial is here below.
Step 1 - Dal cartoncino Solid 6 fustellate un quadrato di 8,5 cm di lato ed eliminate i due triangoli laterali alti circa 1,5 cm e lungi tutto il lato: otterrete così la forma di un vaso da fiore. Dallo stesso cartoncino tagliate anche un rettangolo di 9,5 x 2,5 cm e incollatelo nella parte superiore del vaso.
With the square die, cut a 8,5 brown paper and cut out two triangles with 1,5 cm of heigh, like in the picture: it will be the vase. From the same paper cut a rectangle 9,5 x 2,5 cm: it will be the vase border.
Step 2 - tagliate un rettangolo di cartoncino n.298 di 24 x 10,5 cm e cordonatelo a 6 e 12 cm. Quindi piegatelo a zig zag come in figura.
From the craft paper cut a 24 x 10,5 cm rectangle, and score it at 6 and 12 cm. Then, Z-fold it like the picture.
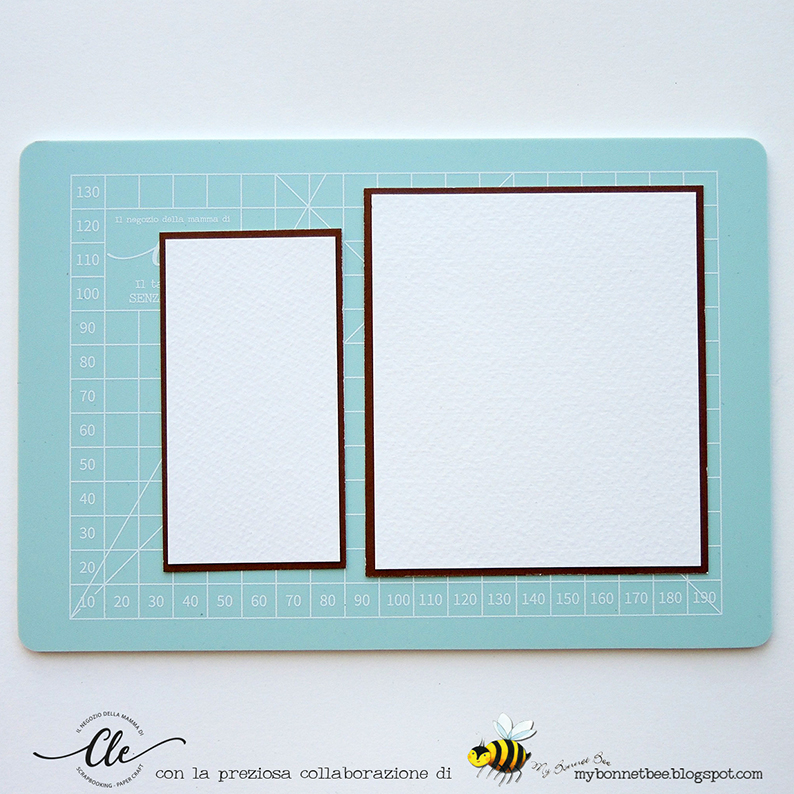
Step 3 - Dal cartoncino Solid 6 tagliate due rettangoli: il primo di 11,5 x 10 cm; il secondo di 10 x 5,5 cm. Quindi mattateli con in cartoncino bianco, lasciando un paio di mm lungo tutto il perimetro.
From the dark brown paper cut two rectangles: the former 11,5 x 10 cm, the latter 10 x 5,5 cm. Then, cover them with the white paper leaving 2 mm on the border.
Step 4 - Con i due rettangoli tagliati nello step precedente, ricoprite le aree del cartoncino craft come in figura.
Use the rectangles you obtained to cover two areas of the craft paper, like in the picture.
Step 5 - Componete il vaso di fiori come più preferite, incollando i die cuts con il biadesivo spessorato. quindi incollate la parte alta del vaso sul cartoncino bianco più stretto, sopra la piega. La parte inferiore del vaso deve rimanere libera.
Compose the vase as you like adding the die cuts with the foam adhesive. Then, glue the upper part of the vase onto the white rectangle, over the fold. The below part of the vase must be unglued.
Step 6 - Stampate la frase che preferite su uno dei banner tra i die cut e attaccatelo spessorandolo poco sotto la metà del rettangolo maggiore: sarà il meccanismo di fermo per il vaso di fiori.
Stamp the sentiment you like on one of the colored banner, and attach it with the foam adhesive near the center of the bigger white rectangle: it will be the stopper for the vase.
Step 7 - Completate decorando il vaso con della iuta o dello spago e un bottone colorato e qualche enamel.
Complete the easel card with a natural string, a colored button, and some enamel dots.
Materiali utilizzati / Supples list:
- Le Fustelle della Cle - Basic Quadrato
- I Timbri della Cle - My 12 tale of 2023 - Aprile
- Le Carte della Cle - Basic Bianca
- Le Carte della Cle - My 12 tales of 2023 - Aprile n.298
- Le Carte della Cle - A4 Mono facciali - Solid 6
- Gli Abbellimenti della Cle - My 12 tale of 2023 - Aprile - Ephemera
- Gli Abbellimenti della Cle - My 12 tale of 2023 - Enamel Aprile
- Le attrezzature della Cle - Biadesivo spessorato


Nessun commento:
Posta un commento
grazie per aver lasciato un commento ^____^