Ecco la card che mi ha ispirato uno dei nuovi set del Mago di Oz!
Potete vedere tutte le bellissime creazioni nate dalla nuova collezione sul blog delle Timbrine.
Non trovate che questa piccola sia Dorothy adorabile?!?
This is the card I made inspired by a new set of Wizard of Oz stamps!
You can see all the beautiful cards of this new collection on Timbrine's blog.
Isn't the little Dorothy adorable?
This is the card I made inspired by a new set of Wizard of Oz stamps!
You can see all the beautiful cards of this new collection on Timbrine's blog.
Isn't the little Dorothy adorable?
Qui vedete i vari passaggi della coloritura (per i dettagli sull'incarnato e i capelli, potete trovare i riferimenti ai colori dei pennarelli qui in questo post).
Here you can see the steps of the coloring (details of skin and hair coloring in this this post).
Here you can see the steps of the coloring (details of skin and hair coloring in this this post).
Colorati e ritagliati i personaggi con le fustelle coordinate, sono pronti per diventare i protagonisti della card!
Colored and die cutted, the characters are ready for the card!
Colored and die cutted, the characters are ready for the card!
Lo sfondo è semplicissimo: basta fustellare 3 nuvolette grandi e 3 medie dal set Nuvole e attaccarle in fila in modo da creare una bordura da usare come stencil per sfumare il colore Distress prescelto.
The background is very simple: you have to die cut 6 clouds (3 big and 3 medium) from the set Nuvole and glue them together in a border such that it looks like a stencil.
The background is very simple: you have to die cut 6 clouds (3 big and 3 medium) from the set Nuvole and glue them together in a border such that it looks like a stencil.
Sfumata la prima fila di nuvole, basta procedere verso l'alto cambiando colore (e spugnetta), fino a terminare con l'azzurro del cielo sullo sfondo.
Change color in every row and end with the Peacock Feathers.
Change color in every row and end with the Peacock Feathers.
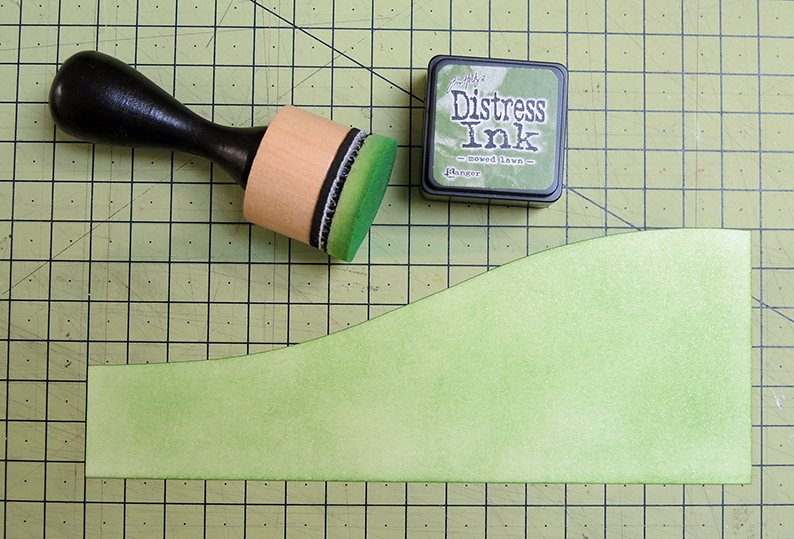
Da un altro cartoncino bianco tagliate a mano libera (o con una fustella) la montagnetta e sfumatela in maniera uniforme col verde prato.
Cut a hill and blend it with the Mowed Lawn pad.
Tagliate anche la sagoma di una strada che man mano scompare in lontananza e coloratela di marrone terra. Componete lo sfondo attaccando i vari pezzi e stampate in nero ed embossate il sentiment presente nel set.
Cut the road and color it. Attach all the elements on the background and stamp (and emboss) the sentiment in the sky.
Cut the road and color it. Attach all the elements on the background and stamp (and emboss) the sentiment in the sky.
A questo punto non vi resta che fustellare altre nuvolette e degli alberelli (dal set Pivot Pop-Up di Lawn Fawn), attaccare Dorothy e Toto col biadesivo spessorato e creare una mattatura con del cartoncino marrone prima di attaccare il tutto su un biglietto a due ante bianco.
Sul sito di Impronte d'Autore da domani potrete trovare tutti i personaggi della serie!
Add some clouds and trees (from Lawn Fawn Pivot Pop-Up), Dorothy and Teo with the foam adhesive and compose the card with brown and white card stock.
On the Impronte d'Autore website you can find all the new collection stamps!
Add some clouds and trees (from Lawn Fawn Pivot Pop-Up), Dorothy and Teo with the foam adhesive and compose the card with brown and white card stock.
On the Impronte d'Autore website you can find all the new collection stamps!


Hi hi, sembra quando da piccola guardavo art attak e il mitico Giovanni presentava ogni lavoro come la cosa più semplice del mondo...poi quando mi mettevo all'opera...
RispondiEliminaIn realtà non è la card ad essere semplice...sei tu che sei bravissima!!!complimenti Monica!!!
Ah! Ah! Ah! Il mitico Giovanni Mucciaccia!!
RispondiEliminaGrazie, cara, sei sempre gentilissima! ^_^