Oggi vi propongo delle card piene di fiocchi di neve!
Trovate il tutorial con un video sulla coloritura qui sul blog di Impronte d'Autore.
Today some cards full of shining snowflakes!
Full tutorial on Impronte d'Autore's blog.
giovedì 13 dicembre 2018
lunedì 10 dicembre 2018
Artigiano in Fiera 2018
Ecco alcuni scatti dalla fiera più attesa dell'anno!
Few shots from AF (Artisan's Fair) in Milan.
Capolavori di Barbara Calzolari ospite dello stand Pentel
Barbara Calzolari's masterpieces with Pentel calligraphy products.
Etichette:
calligrafia/calligraphy,
fiera/fair,
intaglio/carving,
maglia/knitting
martedì 4 dicembre 2018
Topini in viaggio / Delivering mice
Natale è l'occasione perfetta per esprimere solidarietà con chi è meno fortunato di noi, ad esempio costretto in un letto di ospedale.
Ed è proprio vero che a volte bastano poche parole.
Christmas gives you the chance to bond with people less fortunate than us, like sick ones stock in hospital beds.
Usually a few words can make the difference.
Quelle che accompagnano questo dolce topino (ed altri 5 in viaggio) sono scritte in corsivo inglese col pennino a punta fine e l'inchiostro noce. Non sono certo perfette, ma sono scritte col cuore.Usually a few words can make the difference.
Six mice are delivering this brief sentiment ("A light though to worm your heart").
I wrote these words in copperplate with pointed nib and walnut ink. They are not perfect, of course, but I meant them.
Trovate tutte le info su questa iniziativa sul gruppo Calligrafia & Handlettering Italia alla voce #gangforyou.
More info on Calligrafia & Handlettering Italia Fb page by #gangforyou.
Coloritura / Coloring: Zig Real Clean Color
martedì 27 novembre 2018
Novità! Corso Card natalizia in movimento!
Diamo la svolta a questo Natale! Realizziamo insieme questa card in movimento sabato pomeriggio 15 Dicembre da Impronte d'Autore a Milano.
Per info su costi e posti disponibili contattate il negozio.
lunedì 26 novembre 2018
ATC di Novembre / November ATC
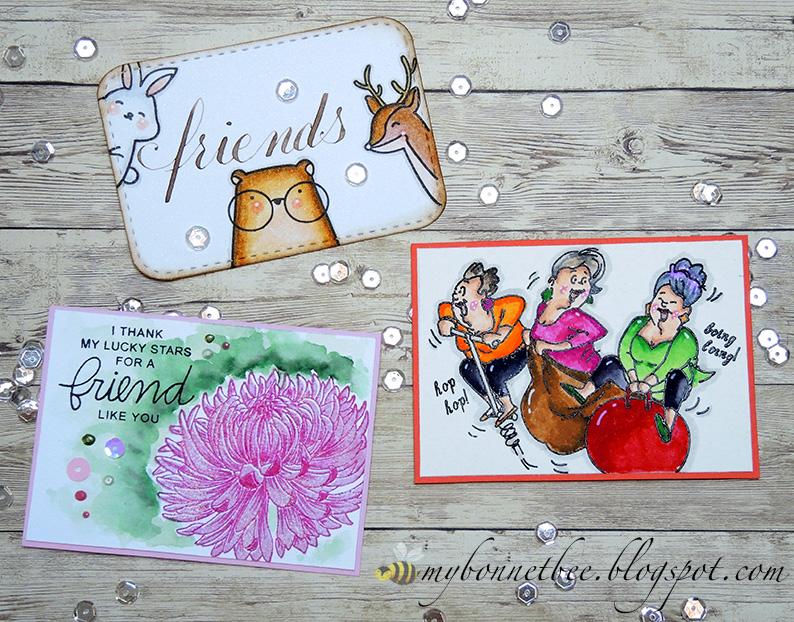
Che meraviglia passare la domenica con le amiche di stamping! Ecco le ATC che ho preparato per loro.
What a beautiful Sunday with my stamping friends!
Nuove ATC per la mia collezione! Grazie, Laura :)
New ATC for my collection! Thanks, Laura :)
Etichette:
ATC,
calligrafia/calligraphy,
La Coppia Creativa,
stamping,
Waffle Flower
martedì 20 novembre 2018
ASPETTANDO IL NATALE / WAITING FOR CHRISTMAS
Sono quasi pronta per Natale.
Forse.
Almost ready for Christmas.
Maybe.
Timbri / Stamps: 2169-CLEM-D Rudy
Fustelle / Dies: 88154-CML-Q Rudy
Coloritura / Coloring: Zig Real Clean Color
Etichette:
Impronte d'Autore,
natale/christmas,
stamping
martedì 13 novembre 2018
100% Xmas!
Seconda card natalizia, questa volta con il nuovissimo set 100% Xmas di Impronte d'Autore.
Another Christmas card, this time with the brand new clear set 100% Xmas by Impronte d'Autore.
Trovate i materiali e il tutorial sul blog delle Timbrine.
Supplies and tutorial on Timbrine's blog.
Another Christmas card, this time with the brand new clear set 100% Xmas by Impronte d'Autore.
Trovate i materiali e il tutorial sul blog delle Timbrine.
Supplies and tutorial on Timbrine's blog.
Etichette:
Impronte d'Autore,
natale/christmas,
Timbrine,
tutorial
venerdì 9 novembre 2018
Nel bosco / Into the wood
Questo set è l'ultimo acquisto fatto in fiera. L'ho adorato appena l'ho visto. E' perfetto per i segnalibri, o per le tag di compleanno, come questa in versione autunnale.
I bought this stamp set in the last fair. It was love it at first sight. It's perfect for bookmarks, or birthday tags, like this one in autumn version.
Non sono adorabili?
Aren't they adorable?
Fustelle / Dies: tag, birch trees
Coloritura / Coloring: Zig Real Clean Color
Etichette:
Impronte d'Autore,
segnalibri/bookmarks,
stamping,
Waffle Flower
lunedì 5 novembre 2018
Pausa novembrina / November break
Inizio novembre a Bormio, Valtellina.
The beginning of November, Bormio, Valtellina.
Natura
Nature
Cibo
Food
Relax
Etichette:
calligrafia/calligraphy,
città/city,
natura/nature,
viaggi/journey
martedì 30 ottobre 2018
Pronti per Halloween? Ready for Halloween?
Halloween è ormai alle porte, e a breve lo saranno anche i bimbi in costume a reclamare dolcetti.
Volete forse lasciarli andare via a mani vuote? Giammai!
Anche perché, diciamocelo, creare card e borsine con streghe e zucchette è divertentissimo!
Halloween is around the corner, with all its monster-kids claiming sweets.
Can they come back empty-handed? Hell, no!
And we must admit it: making cards and sachets with witches and pumpkins is such a fun!
Quest'anno per la decorazione ho scelto la tecnica del no line coloring, cioè la stampa senza bordo evidente, così da dare maggior risalto al colore.
This year I chose to color my characters with the no line technique to enhance the bright colors.
Per prima cosa stampate streghette e zucche sulla carta da acquerello (nel mio caso, Canson) usando il tampone Memento Desert Sand. La stampa deve essere solo una traccia per guidarvi nella coloritura.
First, print streghette and zucche on the watercolor paper (Canson in my case) with Memento Desert Sand pad. The stamp must be a mere guide for the coloring step, make it a trace.
Potete sbizzarrirvi con matite, tempere, acquerelli (nel mio caso i pennarelli Zig Clean Color), ma la cosa essenziale in questa tecnica è mantenere i toni sfumati senza grossi stacchi di colore.
Una volta asciutto il colore, procedete a tagliare le sagome dei vostri personaggi.
You can choose any medium: pencils, tempera, watercolors (I used Zig Clean Color markers), but the important thing is to obtain smooth tones. After stamping the characters, cut them leaving a 1 millimeter white border.
Per creare la struttura della borsina utilizzate la fustella tag, ma senza tagliare la parte finale della striscia di cartoncino: vi basterà tenere il fondo della fustella al di fuori dei tappetini da taglio. Una volta sagomata un'estremità della striscia, giratela e ripetete l'operazione per l'altra estremità. In questo modo, potete ottenere una striscia lunga 28-30 cm.
Use the tag die to cut the sachet structure, but do not cut the bottom of the card stock stripe, as shown in the photo. When you've done with one extremity, turn the stripe and repeat. In this way you can obtain a 28-30 cm long stripe.
Piegate la striscia in modo da ottenere nel mezzo una base di 2-2,5 cm. Se, ad esempio, la vostra striscia misura in tutto 28 cm, potete fare le pieghe a 12 cm dalle estremità, così che vi restino 2 cm esatti per la parte centrale.
Per la parte decorativa, tagliate della carta a tema (che però non tolga la scena ai soggetti stampati) usando la fustella tag.
Bend the stripe to obtain a 2-2,5 cm base. Use the tag die to cut the background from a patterned paper (not too loud).
Per realizzare il banner, utilizzate il tampone Versafine Onyx Black e la polvere da rilievo trasparente per stampare l'Happy Halloween su cartoncino Malmero Perlè Mango, in modo da dare più contrasto al pezzo. Quindi sagomate la scritta usando la fustella Flags.
Sfumate il bordi del banner con il Distress Black Soot e con un pennello intinto nel colore nero fate cadere qualche goccia qua e là sul vostro banner.
Use the Versafine Onyx Black pad and the clear powder to print the Happy Halloween stamp onto the yellow card stock. Than, cut it with the Flags die, and blend the edges with the Distress Black Soot. Add some black splatters.
Ricavate da un cartoncino nero una staccionata usando la fustella Spooky Fence Border e sfumatene i bordi con il Brilliance Moonlight White. Sfumate anche i bordi delle carte di sfondo, usando il Distress Wilted Violet oppure il Distress Spiced Marmelade (o comunque dei colori che richiamino quelli che avete usato per colorare i vostri soggetti protagonisti).
A questo punto tutti i pezzi sono pronti per comporre la vostra bustina porta dolcetti!
With the Spooky Fence Border die cut a black fence and blend on it the Brilliance Moonlight White pad. Blend the background paper borders too, by using Distress Wilted Violet or Distress Spiced Marmelade (or colors that recall the ones you used for the characters).
At this point all the pieces are ready to set your Halloween sachet!
With the Spooky Fence Border die cut a black fence and blend on it the Brilliance Moonlight White pad. Blend the background paper borders too, by using Distress Wilted Violet or Distress Spiced Marmelade (or colors that recall the ones you used for the characters).
At this point all the pieces are ready to set your Halloween sachet!
Incollate la carta decorata sul frontespizio della bustina, tenendola piuttosto bassa.
Sovrapponete la staccionata col biadesivo spessorato, facendola sporgere un pochino ai lati: questo darà più tridimensionalità al pezzo.
Glue the background paper onto the front of the stripe, close to the base.Attach the fence with foam adhesive (let it sticking on the sides to add more tridimensionality).
Attaccate col biadesivo spessorato la streghetta e la zucca davanti alla staccionata. Pinzate il banner in alto a destra, e infine aggiungete qualche goccia di Nuvo Dandelion Yellow o Crushed Grape.
Attach the witch and the pumpkin onto the fence by using the foam adhesive. Staple the banner on the top right side, than add few drops of Dandelion Yellow or Crushed Grape Nuvo.
Scegliete un nastrino a tema con cui chiudere la bustina, farcite l'interno con un bel sacchetto di caramelle ed il gioco è fatto!
Attach the witch and the pumpkin onto the fence by using the foam adhesive. Staple the banner on the top right side, than add few drops of Dandelion Yellow or Crushed Grape Nuvo.
Scegliete un nastrino a tema con cui chiudere la bustina, farcite l'interno con un bel sacchetto di caramelle ed il gioco è fatto!
Match ribbons and color with care, stuff everything with candies and that's all folks! Halloween!!
HAPPY HALLOWEEN!!
Etichette:
acquerello/watercolour,
Halloween,
Impronte d'Autore,
Lawn Fawn,
scatoline/boxes,
stamping,
tutorial
Iscriviti a:
Post (Atom)