Un segnalibro veloce veloce per il mio maritino. Adoro questo set di timbri componibili di Stampendous!
A quick bookmark for my hubby! I love this old Stampendous set.
Timbri / Stamps: SSC1031 (Stampendous)
Coloritura / Coloring: Mini Distress pad
mercoledì 27 giugno 2018
mercoledì 20 giugno 2018
Wish Pig Tag
Non è adorabile questo paffuto maialino? ^_^
(Per il tutorial sulla coloritura leggete questo post).
Today quick tag about one of my favorite stamp set.
Isn't adorable this chubby pig? ^_^
(For coloring tutorial, please see this post).
Timbri / Stamps: BB Hog Heaven
Fustelle / Dies: BDie-namics BB Hog Heaven, Tags,
Coloritura / Coloring: Chameleon pens
Etichette:
Chameleon,
Impronte d'Autore,
MFT,
stamping,
tag
mercoledì 13 giugno 2018
Bath Tag con Lawn Fawn / Bath Tag featuring Lawn Fawn
Oggi vi propongo una tag nata per accompagnare il regalo per un'amica che adora i prodotti da bagno e le bollicine profumate!
Today it's time for a bath tag I made for a friend of mine who loves bubble bath!
Trovate il tutorial completo e i materiali usati sul blog di Impronte d'Autore.
Full tutorial on Impronte d'Autore blog.
Today it's time for a bath tag I made for a friend of mine who loves bubble bath!
Trovate il tutorial completo e i materiali usati sul blog di Impronte d'Autore.
Full tutorial on Impronte d'Autore blog.
Etichette:
Impronte d'Autore,
Lawn Fawn,
segnalibri/bookmarks,
stamping,
tag,
Timbrine,
tutorial
domenica 10 giugno 2018
Corsi di sabato 9 giugno 2018: foto di gruppo
Bravissime le mie corsiste che hanno sfidato il caldo di (quasi) inizio estate per realizzare la loro slide card!!
Guardate che meraviglie hanno prodotto. (Ok, la foto è un po' fuori fuoco, ma vi assicuro che il risultato è stato super!)
Per i miei prossimi corsi da Impronte d'Autore ci rivediamo a settembre. Buone vacanze!!
Guardate che meraviglie hanno prodotto. (Ok, la foto è un po' fuori fuoco, ma vi assicuro che il risultato è stato super!)
Per i miei prossimi corsi da Impronte d'Autore ci rivediamo a settembre. Buone vacanze!!
martedì 5 giugno 2018
Friendship & Butterflies

Questa card è molto semplice e pulita, ma mi piace particolarmente per i colori di fondo, che virano dall'azzurro al turchese, al blu, al violetto e danno risalto alle farfalle che vi si posano leggere.
I love the colored background of this very simple card.
Poche paillette e qualche goccia di Nuvo Crystal Drops giusto come come vezzo per augurare ad un'amica un compleanno speciale.
Few sequins and Nuvo Crystal Drops make this card special to a friend.Timbri/ Stamps: Texture - Butterflies Clear Stamp, 4176H friendship
Coloritura/ Coloring: Mini Distress Pad
Etichette:
acquerello/watercolour,
Kaisercraft,
stamping
martedì 29 maggio 2018
Corso Slide Card
Creeremo insieme una divertente slider card utilizzando timbri, colori e fustelle!
Tutte le info per prenotare qui sul sito.
Vi aspetto!
giovedì 24 maggio 2018
Favor Bag & Tag
Tempo di nuovi corsi da Impronte d'Autore!
Tutte le info per prenotare qui.
Vi aspetto!
Questo è quello che realizzeremo sabato 9 giugno nel corso pomeridiano nel negozio di Milano.
Si tratta di un progetto che unisce una scatola porta regalino con la tag di accompagnamento, perché è risaputo: due è meglio di uno! ^_^
Vi aspetto!
Etichette:
corsi/workshop,
Impronte d'Autore,
scatoline/boxes,
stamping
venerdì 18 maggio 2018
Primavera! / Spring!
domenica 13 maggio 2018
Card floreale / Floral card
In occasione della Festa della Mamma, oggi vi propongo una card floreale piena di colore!
Today let me introduce you to a colorful card I made for Mother's day (suitable for many other occasions).
Trovate il tutorial e i materiali usati qui sul blog delle Timbrine.
Full tutorial and materials on Timbrine's blog.
Today let me introduce you to a colorful card I made for Mother's day (suitable for many other occasions).
Trovate il tutorial e i materiali usati qui sul blog delle Timbrine.
Full tutorial and materials on Timbrine's blog.
Etichette:
acquerello/watercolour,
Impronte d'Autore,
stamping,
Timbrine,
tutorial
lunedì 7 maggio 2018
È arrivato il Mago di Oz! The Wizard of Oz is here!
Ecco la card che mi ha ispirato uno dei nuovi set del Mago di Oz!
Potete vedere tutte le bellissime creazioni nate dalla nuova collezione sul blog delle Timbrine.
Non trovate che questa piccola sia Dorothy adorabile?!?
This is the card I made inspired by a new set of Wizard of Oz stamps!
You can see all the beautiful cards of this new collection on Timbrine's blog.
Isn't the little Dorothy adorable?
This is the card I made inspired by a new set of Wizard of Oz stamps!
You can see all the beautiful cards of this new collection on Timbrine's blog.
Isn't the little Dorothy adorable?
Qui vedete i vari passaggi della coloritura (per i dettagli sull'incarnato e i capelli, potete trovare i riferimenti ai colori dei pennarelli qui in questo post).
Here you can see the steps of the coloring (details of skin and hair coloring in this this post).
Colorati e ritagliati i personaggi con le fustelle coordinate, sono pronti per diventare i protagonisti della card!
Colored and die cutted, the characters are ready for the card!
Lo sfondo è semplicissimo: basta fustellare 3 nuvolette grandi e 3 medie dal set Nuvole e attaccarle in fila in modo da creare una bordura da usare come stencil per sfumare il colore Distress prescelto.
The background is very simple: you have to die cut 6 clouds (3 big and 3 medium) from the set Nuvole and glue them together in a border such that it looks like a stencil.
Sfumata la prima fila di nuvole, basta procedere verso l'alto cambiando colore (e spugnetta), fino a terminare con l'azzurro del cielo sullo sfondo.
Change color in every row and end with the Peacock Feathers.
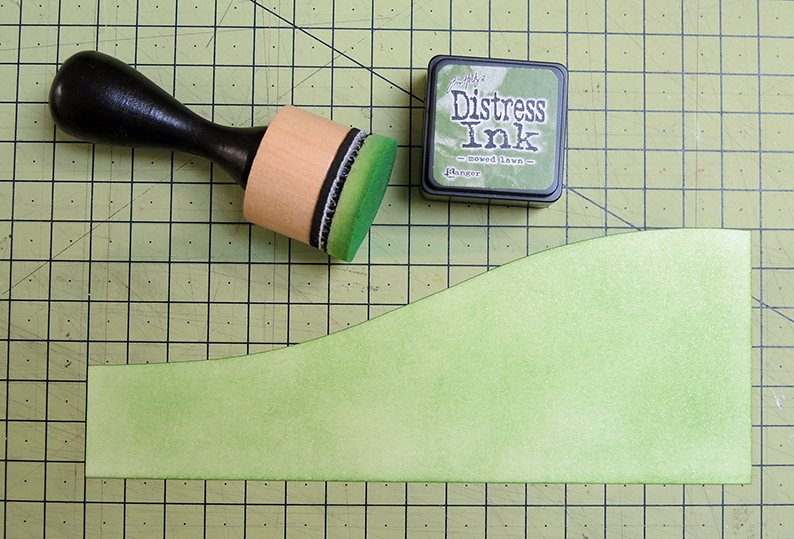
Da un altro cartoncino bianco tagliate a mano libera (o con una fustella) la montagnetta e sfumatela in maniera uniforme col verde prato.
Cut a hill and blend it with the Mowed Lawn pad.
Tagliate anche la sagoma di una strada che man mano scompare in lontananza e coloratela di marrone terra. Componete lo sfondo attaccando i vari pezzi e stampate in nero ed embossate il sentiment presente nel set.
Cut the road and color it. Attach all the elements on the background and stamp (and emboss) the sentiment in the sky.
A questo punto non vi resta che fustellare altre nuvolette e degli alberelli (dal set Pivot Pop-Up di Lawn Fawn), attaccare Dorothy e Toto col biadesivo spessorato e creare una mattatura con del cartoncino marrone prima di attaccare il tutto su un biglietto a due ante bianco.
Sul sito di Impronte d'Autore da domani potrete trovare tutti i personaggi della serie!
Add some clouds and trees (from Lawn Fawn Pivot Pop-Up), Dorothy and Teo with the foam adhesive and compose the card with brown and white card stock.
On the Impronte d'Autore website you can find all the new collection stamps!
Add some clouds and trees (from Lawn Fawn Pivot Pop-Up), Dorothy and Teo with the foam adhesive and compose the card with brown and white card stock.
On the Impronte d'Autore website you can find all the new collection stamps!
Etichette:
Impronte d'Autore,
Lawn Fawn,
stamping,
Timbrine,
tutorial
Iscriviti a:
Post (Atom)